On the other hand, since UEFI uses the GUID Partition Tables (GPT) instead of the Master Boot Record (MBR), it could easily read devices that are larger than 2.1TB in size. Moreover, it also has a faster booting time and is much more secure than its counterpart. So owing to all these reasons, it makes complete sense as to why users are looking to convert the Legacy BIOS to UEFI/MBR to GPT in Windows 11. If you are also in the same boat, then this guide shall help you out. Follow along.
How to Convert Legacy BIOS to UEFI/MBR to GPT in Windows 11
Before starting with the process, there are a few things that you need to keep in mind, namely;
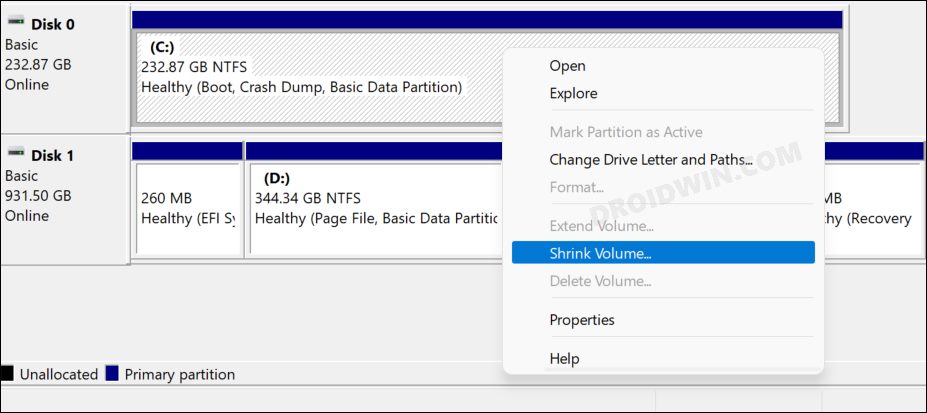
Make sure to take a backup of all the data on your PC. While the conversion process wouldn’t format the drive, but it is still recommended to be on the safer side. Droidwin and its members wouldn’t be held responsible in case of a thermonuclear war, your alarm doesn’t wake you up, or if anything happens to your device and data by performing the below steps. The disk you are trying to convert should not have more than three partitions. If that is the case, then consider shrinking it via the Windows built-in Disk Partition Tool.Next up, make sure to disable the BitLocker Protection before you convert Legacy BIOS to UEFI/MBR to GPT on your Windows 11 PC.
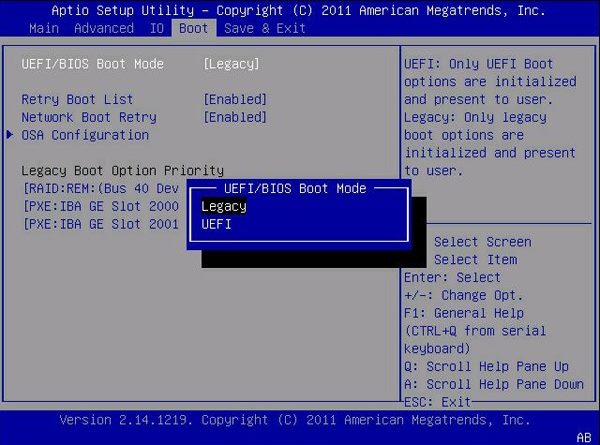
Check if your PC has Legacy BIOS or UEFI
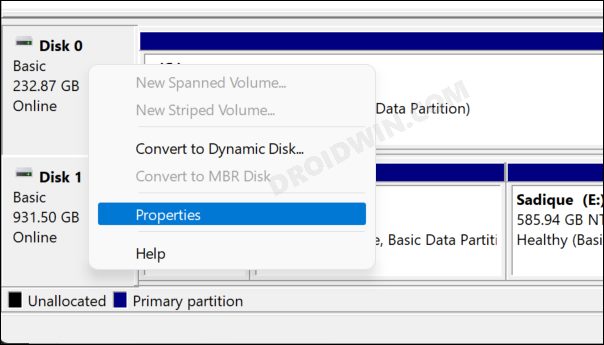
First and foremost, let’s verify that your PC indeed has Legacy BIOS instead of UEFI. Here’s how it could be done:
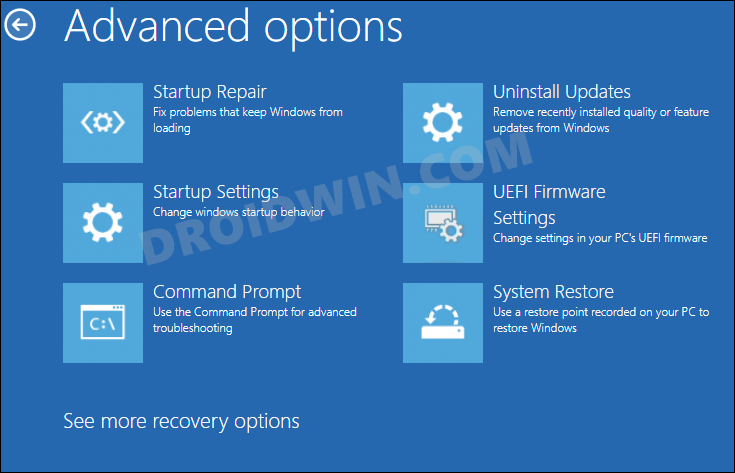
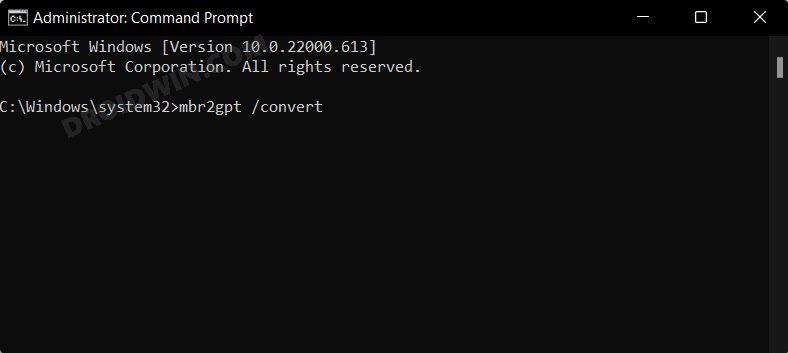
Convert Legacy BIOS to UEFI in Windows 11
Finally, save and exit the changes. That’s it, the conversion stands complete and you may now boot the PC to the OS.
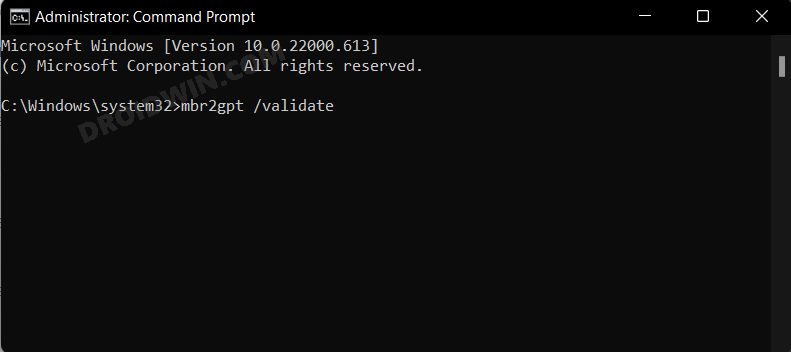
Verify if BIOS to UEFI Conversion and MBR to GPT is Successful
Now that we have successfully converted Legacy BIOS to UEFI [MBR to GPT] on your Windows 11 PC, let’s cement this statement by factually verifying it. There are two different methods through which you could do the same, namely-
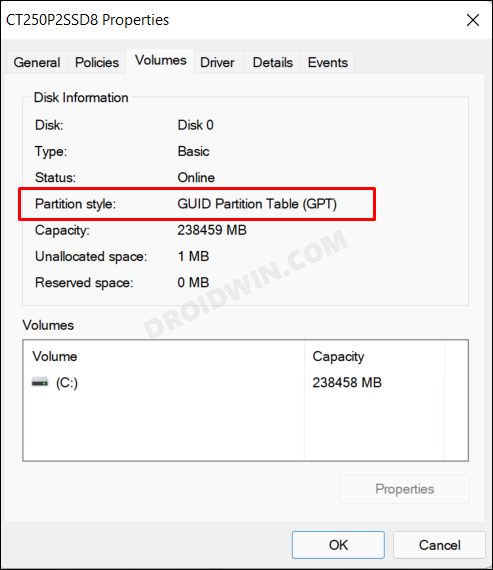
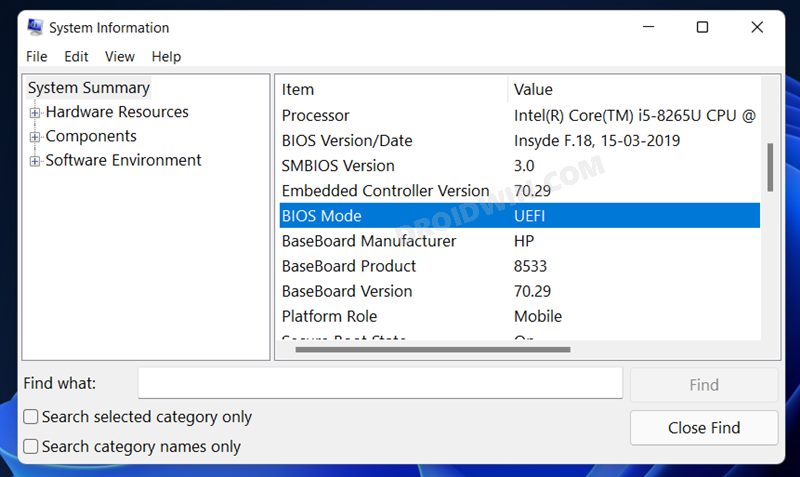
You may refer to the Partition Style of Disk 0 [as explained earlier in this guide] and it should now show GUID Partition Table (GPT) [instead of Master Boot Record (MBR)].Or launch the System Information app from Start Menu, select System Summary from the left-hand side and refer to BIOS Mode, it should have UEFI written next to it.
That’s it. These were the steps to convert the Legacy BIOS to UEFI and MBR to GPT in Windows 11. If you have any queries concerning the aforementioned steps, do let us know in the comments. We will get back to you with a solution at the earliest.
How to Reset BIOS in Windows 11Guide to Install and Enable Hyper-V in Windows 11How to Enable All CPU Cores in Windows 11How to boot Windows 11 to Safe Mode when it cannot boot to OS
About Chief Editor