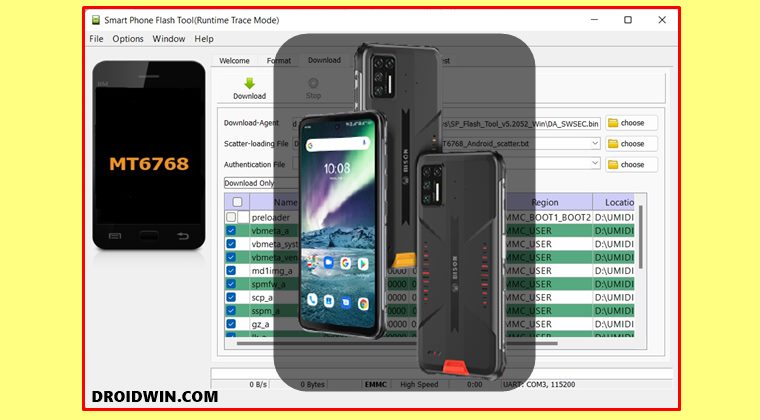
Right from the ability to flash custom ROMs to install custom recoveries, there’s a lot to try out. Likewise, you could also gain administrative privileges by rooting the device via Magisk. Furthermore, though the OEM is not among the fastest to release the latest OS upgrades, yet it makes sure that all its eligible devices get the updates in a timely manner. So if the OEM is already releasing the Over-The-Air update, why you would need to manually flash the stock firmware on your Umidigi device? And more importantly, how could you manually flash the firmware file onto your Umidigi device? Well, in this guide, we will be answering both of these queries. So without any further ado, let’s get started.
Why Should I Manually Flash Stock Firmware on Umidigi?
So this is the most common query that a lot of users ask- when Umidigi is already releasing the OTA updates, why should you make additional efforts of manually flashing the firmware ZIP files? Well, there are a plethora of reasons why you would need to carry out this task manually, let’s check them out:
Unbrick Umidigi Device
As mentioned before, the Umidigi device supports a plentitude of custom binaries. However, these tweaks could sometimes prove to be a little bit risky as well. If you end up flashing an incorrect binary, then your device will end up in a bootloop or soft-bricked state. In that case, you could easily unbrick your Umidigi device by flashing the stock firmware.
Enjoy Faster Updates on Umidigi
If your device is yet to receive an OTA update, but you have managed to get hold of the update’s ZIP file, then you could also manually flash it onto your device. This way you will be able to enjoy the goodies before most of the other users of your region.
Revert Umidigi to Stock
Moreover, if you wish to unroot your Umidigi device, remove all the custom binaries from it, or uninstall TWRP from your Umidigi device, then you will also have to flash the stock firmware.
Downgrade Umidigi Device
In case you want to flash the downgrade firmware on your Umidigi, then also it will require you to flash the stock firmware. For example, in case you wish to go back to Android 10 from Android 11, then you just need to get hold of the downgrade firmware and flash it onto your Umidigi device. Well, these are just some of the benefits why you would need to flash the stock firmware onto your Umidigi device, there could be a plentitude of others. So without further ado, let’s check out the steps to flash the stock firmware on Umidigi devices. Follow along.
How to Flash Stock Firmware on Umidigi Devices
The below instructions are listed under separate sections for ease of understanding. Make sure to follow in the exact same sequence as mentioned. Droidwin and its members wouldn’t be held responsible in case of a thermonuclear war, your alarm doesn’t wake you up, or if anything happens to your device and data by performing the below steps.
STEP 1: Download SP Flash Tool
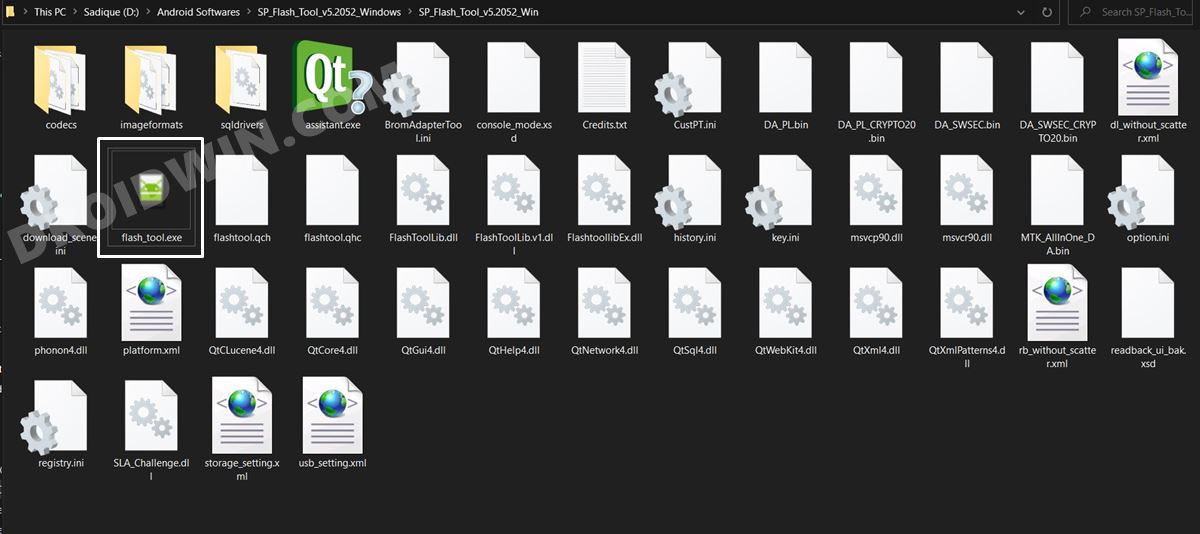
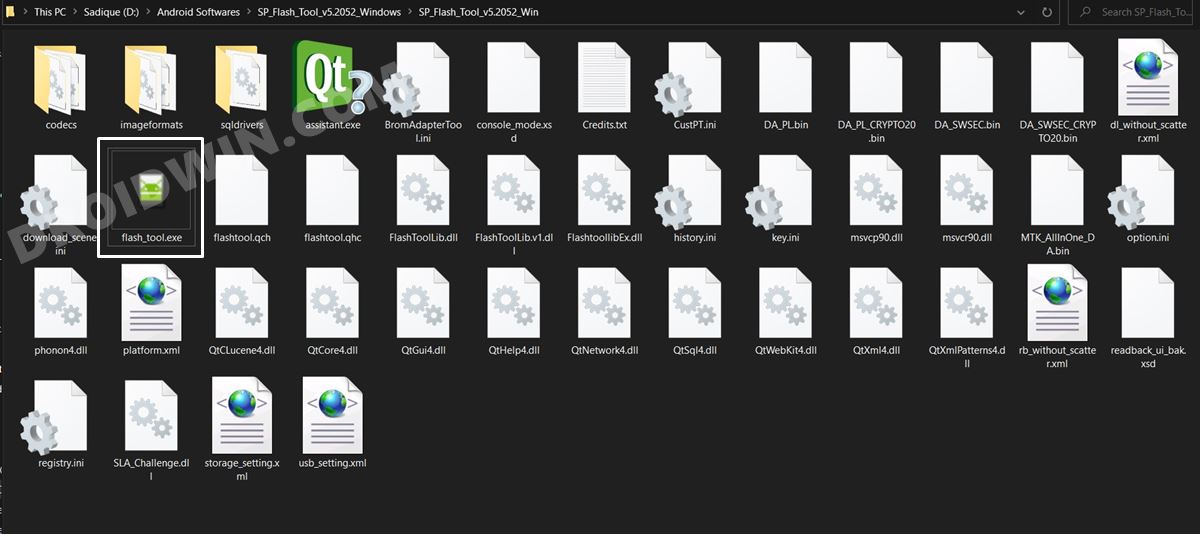
To begin with, download the latest version of SP Flash Tool: SP_Flash_Tool_v5.2052_Windows.zip. This tool will be used to flash stock firmware onto your Umidigi device. Once the download is complete, extract the tool to any convenient location on your PC.
STEP 2: Download Umidigi Firmware
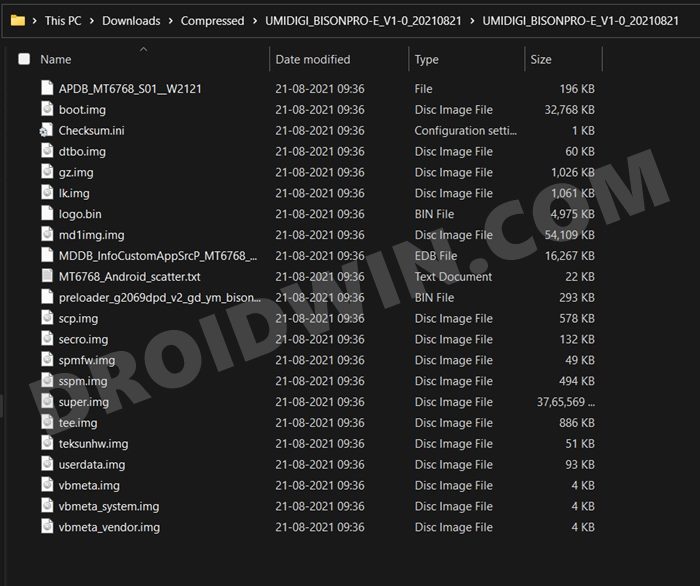
Next up, download the stock firmware for your Umidigi device. We have provided the official download links for these firmwares below. So go ahead and download the firmware for your device.
Once you have downloaded the firmware file, extract it to any location on your PC and then move over to the next step to flash stock firmware on Umidigi.
STEP 3: Install MediaTek USB Drivers
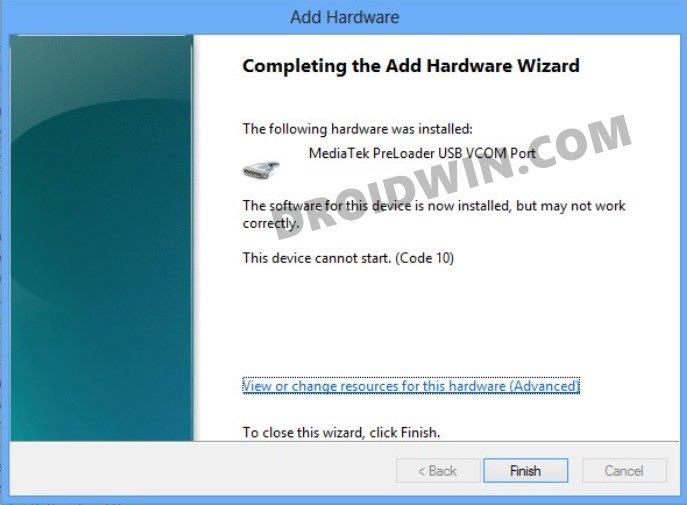
You will also have to download and install the MediaTek USB Drivers. This is needed so that your PC is able to identify the connected Umidigi device. So refer to our comprehensive tutorial on How to Download and Install MediaTek USB VCOM Drivers.
STEP 4: Connect Umidigi to PC
There are two different methods through which you could connect your Umidigi device to the PC. The first method is for those devices that have a removable battery whereas the second one is for non-removable battery smartphones. Proceed with the one that meets your requirements.
METHOD 1: Power off your device and remove the battery. Then keep your device in this state for around 20 seconds. After that, reinsert the battery (but keep it turned off) and connect your device to the PC via USB cable.METHOD 2: Power off your device. Then press and hold the Volume Down key (or Volume Up on some devices) and connect your device to the PC via USB cable.
STEP 5: Flash Stock Firmware on Umidigi via SP Flash Tool
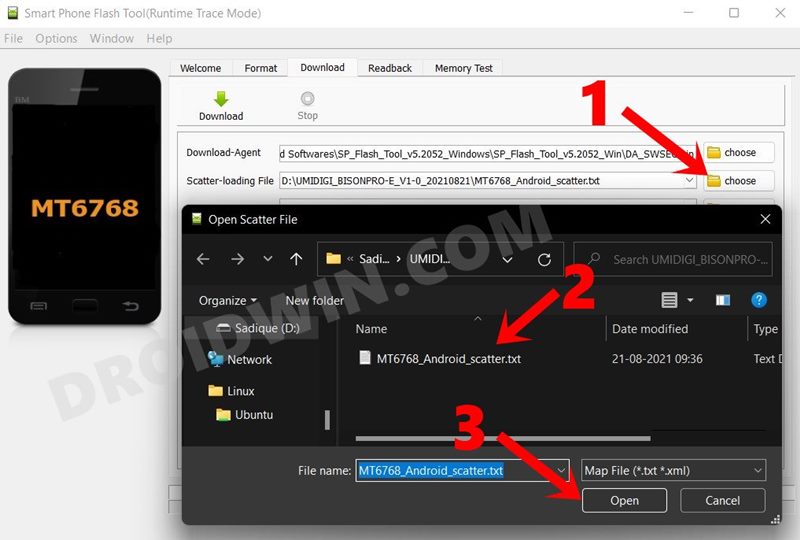
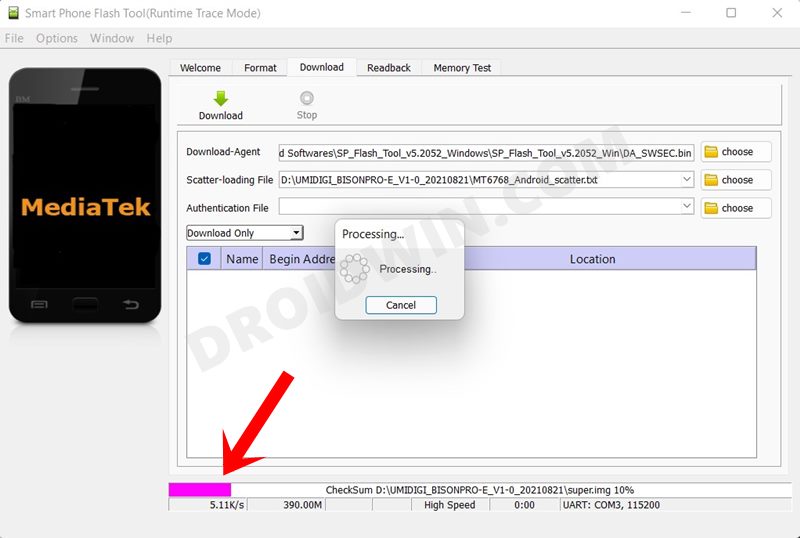
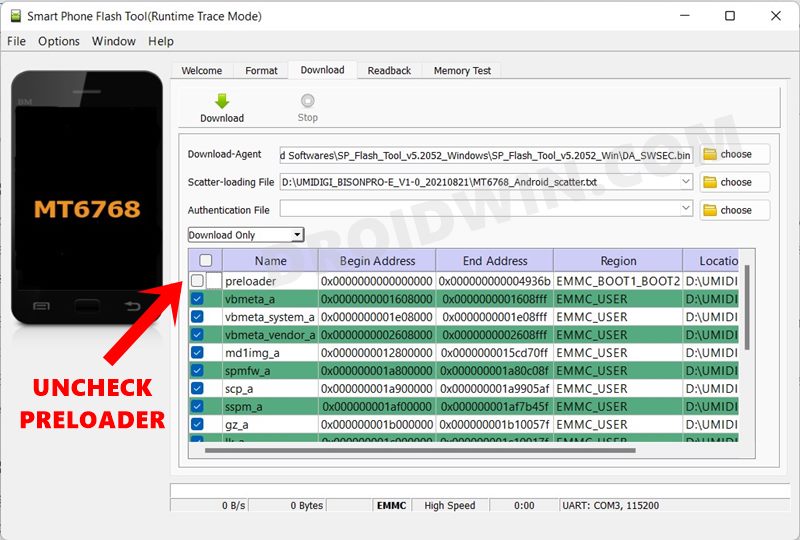
That’s it. These were the steps to flash the stock firmware on Umidigi devices. If you have any queries concerning the aforementioned steps, do let us know in the comments. We will get back to you with a solution at the earliest.
How to Unlock the Bootloader on Umidigi DevicesHow to Root Umidigi Devices via Magisk Patched Boot.imgRepair IMEI, MEID, TEE Data, and Google certificate on Umidigi DevicesHow to Fix Invalid IMEI on any MediaTek via ADB Commands
About Chief Editor
