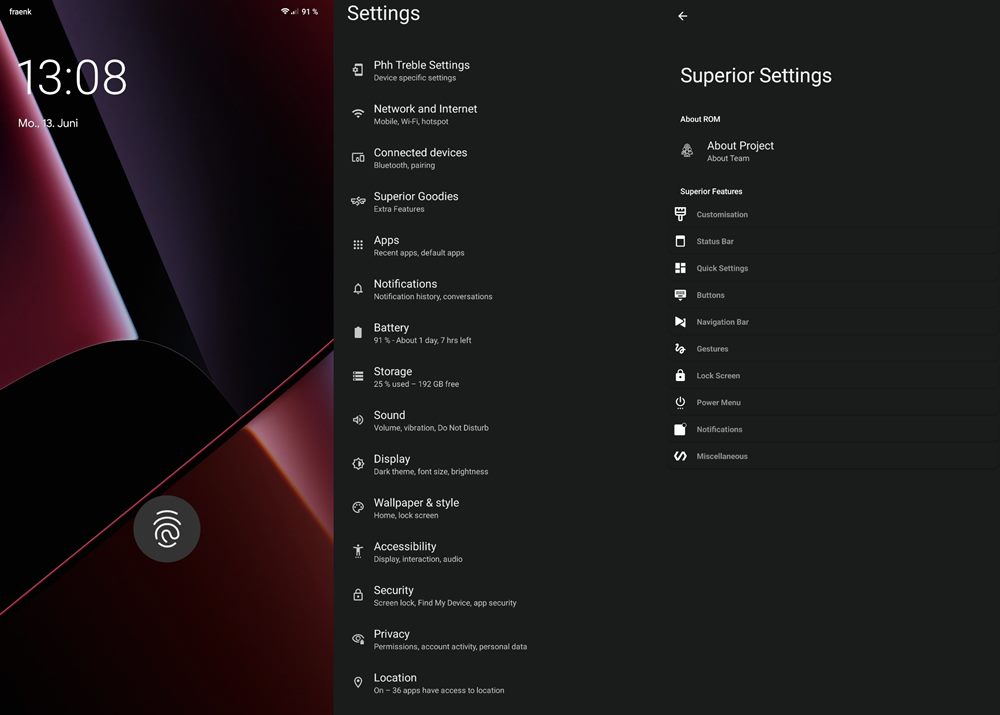
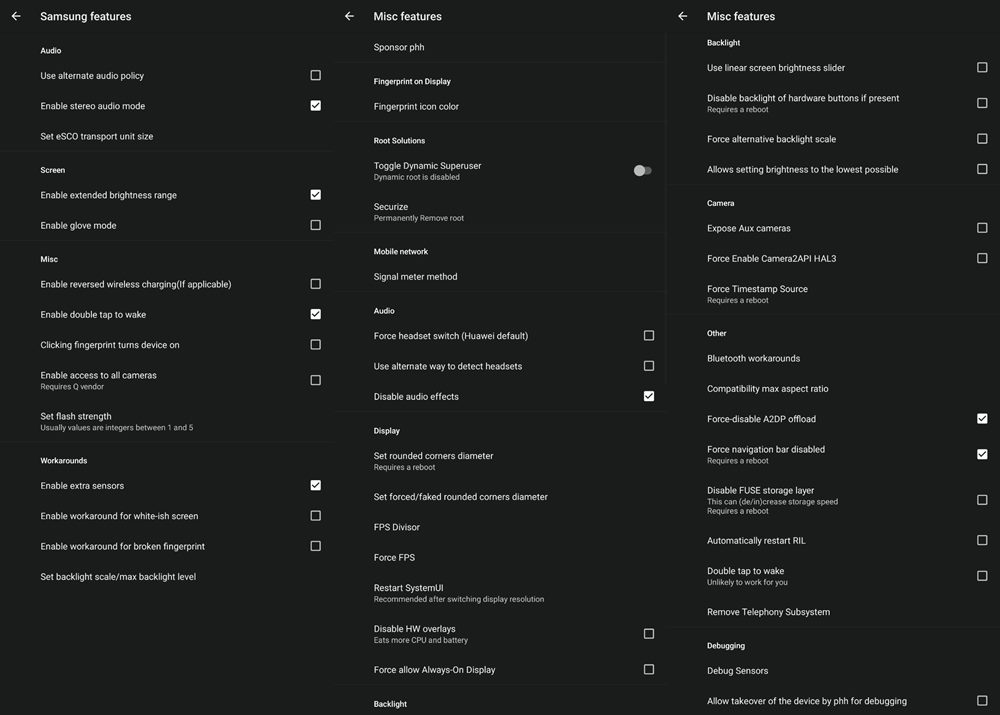
then if we step into the custom development, there are quite a few tweaks already waiting in line to make a permanent abode on your device. From gaining administrative access by rooting your device via Magisk to installing a custom recovery like TWRP, there are a plethora of tweaks to try out. However, when it comes to the customized firmware domain, then there’s currently not much to talk about. At the time of writing, there’s just one single Magisk-based ROM, and the list stops right there. But while there aren’t many custom ROMs, there are a slew of Generic System images that you could give a try. From LineageOS to Pixel Experience, the list is quite a lengthy one [as is evident in the next section]. So without any further ado, let’s get started with the steps to install the custom/GSI ROM of your choice onto your Galaxy S22/Plus/Ultra.
Install Custom ROMs/GSI on Galaxy S22/Plus/Ultra
The below instructions are listed under separate sections for ease of understanding. Make sure to follow the same sequence as mentioned. Droidwin and its members wouldn’t be held responsible in case of a thermonuclear war, your alarm doesn’t wake you up, or if anything happens to your device and data by performing the below steps.
STEP 1: Install Android SDK
First and foremost, you will have to install the Android SDK Platform Tools on your PC. This is the official ADB and Fastboot binary provided by Google and is the only recommended one. So download it and then extract it to any convenient location on your PC. Doing so will give you the platform-tools folder, which will be used throughout this guide to install the Custom/GSI ROM onto Samsung Galaxy S22/Plus/Ultra.
STEP 2: Download GSI ROM for Galaxy S22/Plus/Ultra
You may now grab hold of the desired GSI ROM for your device from below-
Official Android 12/12L ROMs
Unofficial Android 12/12L ROMs
STEP 3: Download GSI Flasher Tool
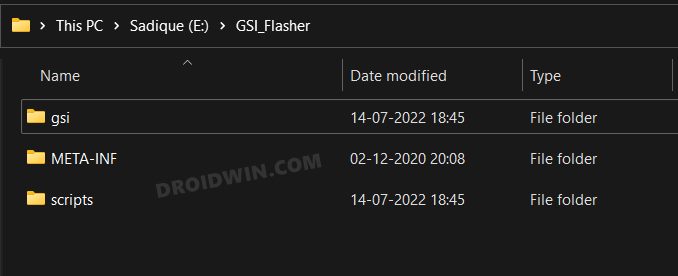
Next up, download the GSI Flasher Tool and extract it to any convenient location on your PC.
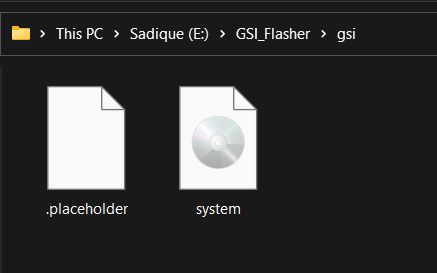
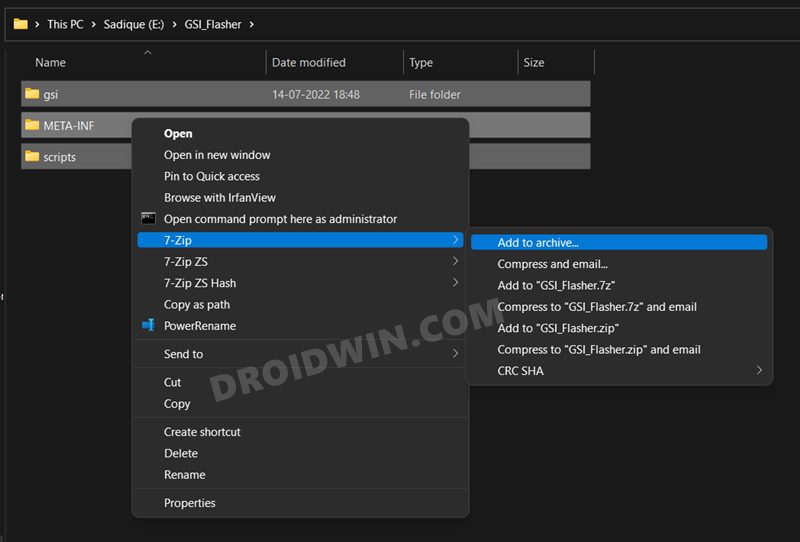
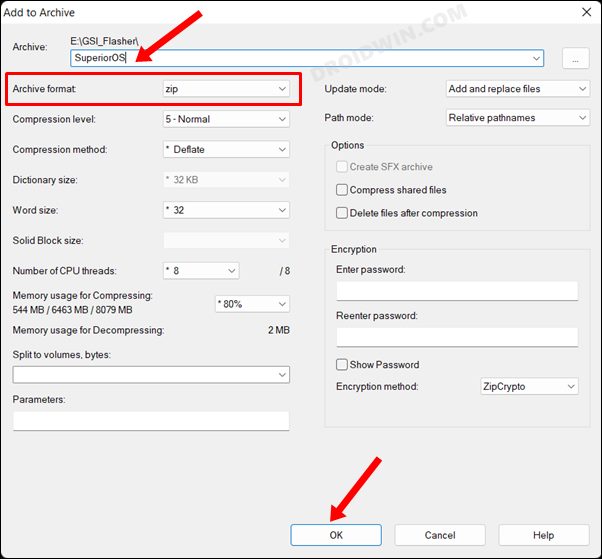
STEP 4: Convert GSI ROM to TWRP Flashable
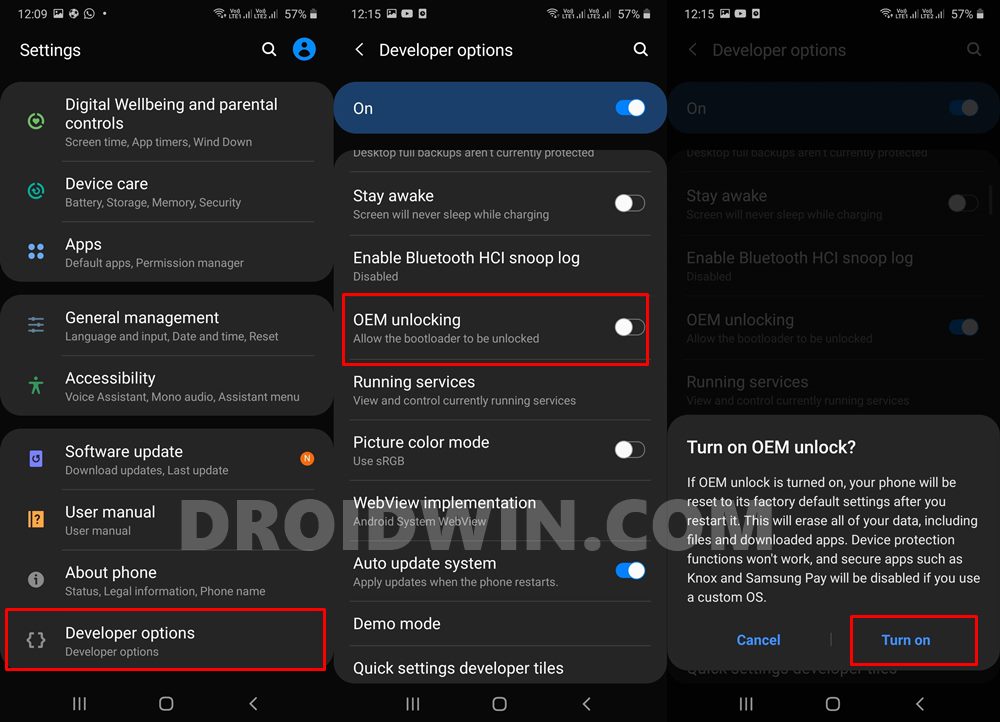
STEP 5: Enable USB Debugging and OEM Unlocking
You will also have to enable USB Debugging and OEM Unlocking on your device. The former will make your device recognizable by the PC in ADB mode. This will then allow you to boot your device to Fastboot Mode. On the other hand, OEM Unlocking is required to carry out the bootloader unlocking process.
So head over to Settings > About Phone > Tap on Build Number 7 times > Go back to Settings > System > Advanced > Developer Options > Enable USB Debugging and OEM Unlocking.
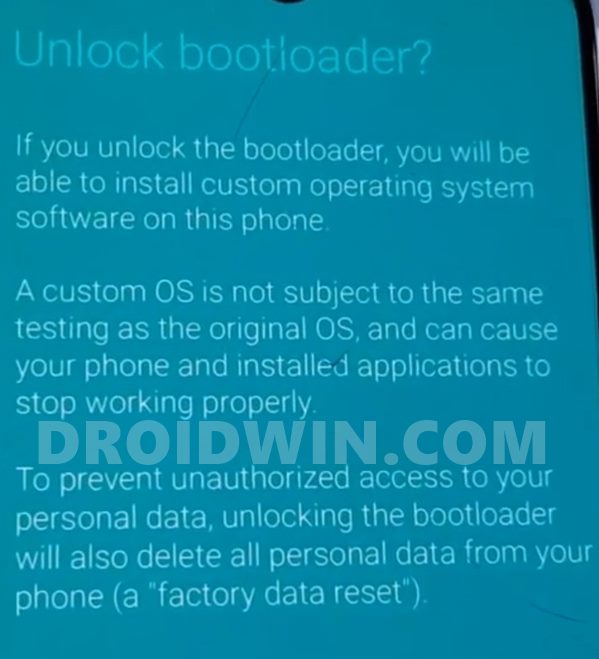
STEP 6: Unlock Bootloader
You will also have to unlock the device’s bootloader to install the Custom/GSI ROM onto Samsung Galaxy S22/Plus/Ultra. Do note that doing so will wipe off all the data from your device and could nullify its warranty as well. So if that’s all and good, then please refer to our guide on How to Unlock Bootloader on Samsung Galaxy S22, S22 Plus, S22 Ultra
STEP 7: Install TWRP Recovery
Your device also needs to have a working TWRP Recovery installed using the Odin Tool. If you haven’t done so yet, then refer to our guide on How to Install TWRP Recovery on Galaxy S22 Ultra
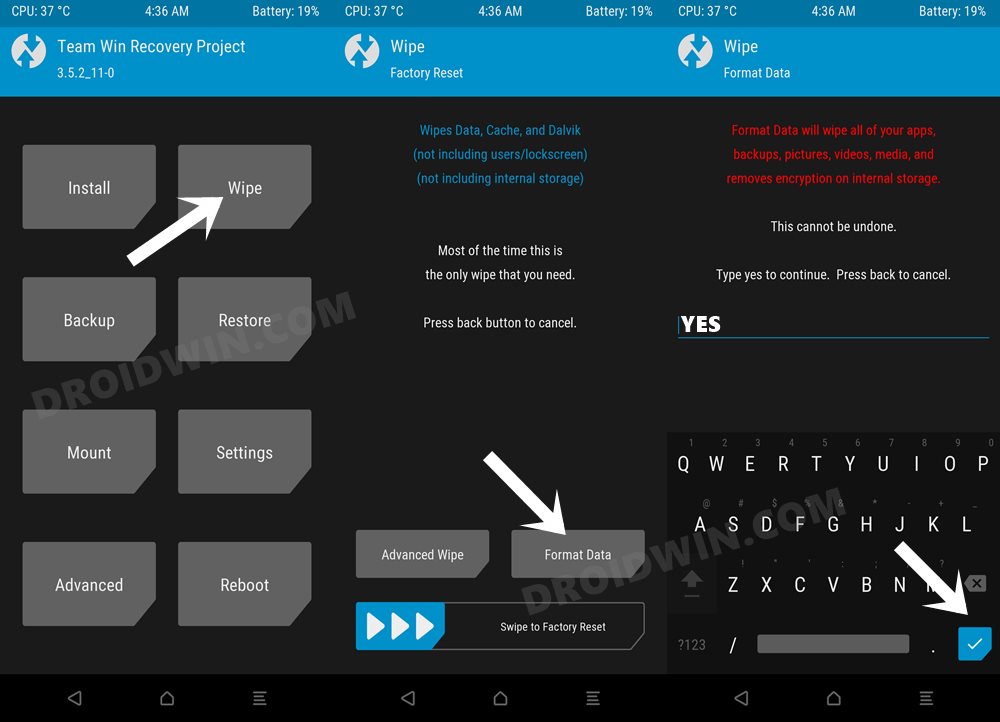
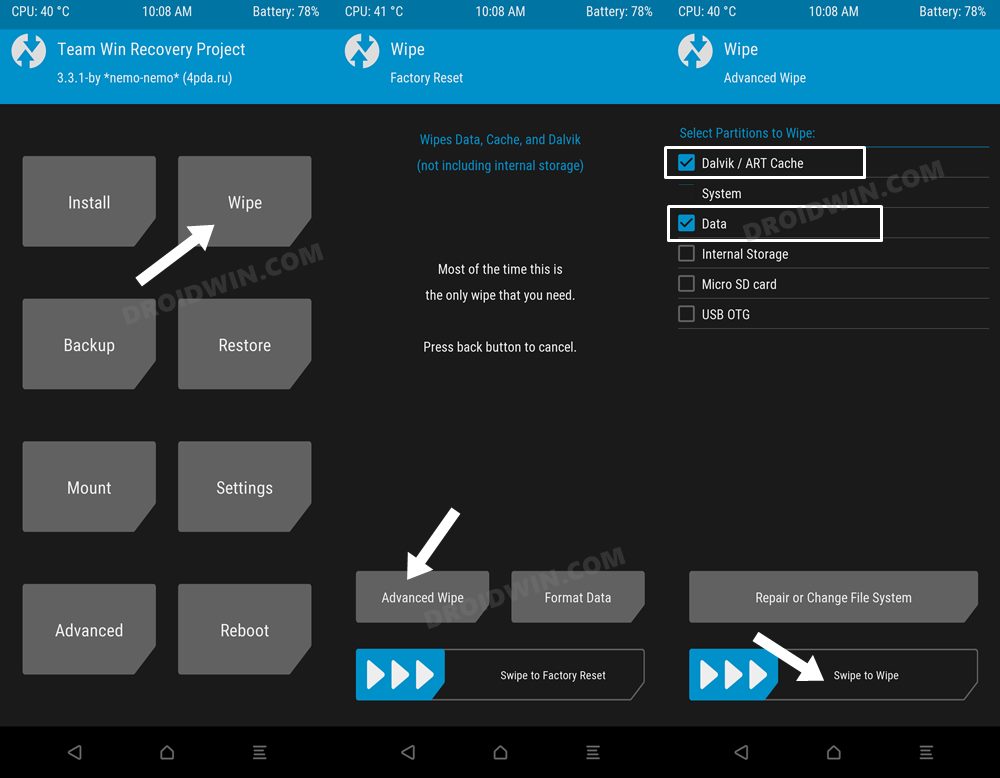
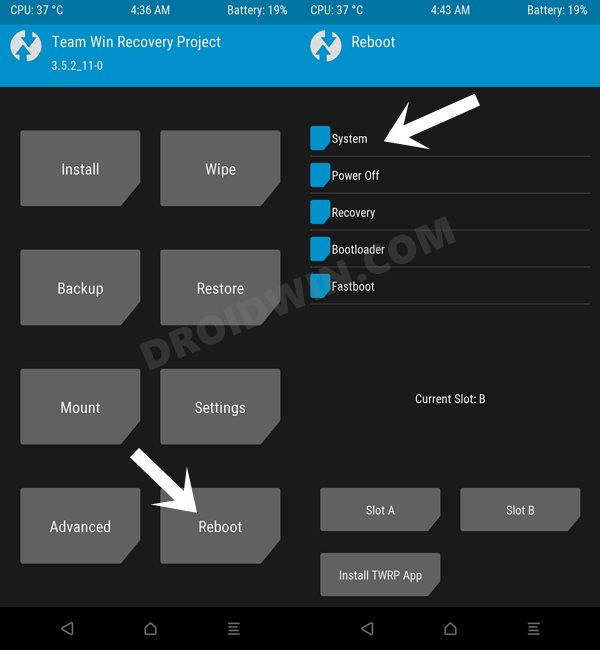
STEP 8: Boot to TWRP
STEP 9: Install GSI ROM via TWRP
So these were the steps to install the Custom/GSI ROM onto Samsung Galaxy S22/Plus/Ultra. If you have any queries concerning the aforementioned steps, do let us know in the comments. We will get back to you with a solution at the earliest.
Debloat/Remove Bloatware from Galaxy S22/Plus/Ultra via ADBRemove Bootloader Unlock Warning on Galaxy S22/Plus/UltraGalaxy S22 Ultra WiFi not working: Connected without Internet [Fix]Call Dropping and Mobile Data issue in Galaxy S22 Ultra: How to Fix
GSI ROMs are known to go through a few bugs and issues related to network, 5G, or VoWIFI/VoLTE. In case, you also come across such bugs, then you could refer to our below-listed guides to fix them.
5G, Bluetooth, 90Hz Display, DT2W not working in GSI ROM: How to FixNo Audio in Bluetooth/Wired Headphones in GSI ROM [Fixed]
Likewise, if your device gets stuck in a continuous bootloop, then it’s most probably in need of disabling the verity checks, which requires flashing the vbmeta. All these have been explained in the below-linked guides, do check them out, if needed
Device not booting after flashing GSI: How to FixStuck on Bootloop after flashing GSI: Fix by Disabling DM-Verity or Android Verified Boot
About Chief Editor