However, it seems to be fallen behind on the software side. Many users have voiced their concern that the MIUI interface is not in sync with their requirements. it gives out a bloated usage experience with tons of unnecessary bloatwares and customization features. If you are also on the same page, then you now have the option to leave the Xiaomi ecosystem. In return, you are being welcome to the house of one of the most popular custom ROMs out there. Known as LineageOS, it has stuck the right balance between the feature set, performance, and overall device stability. And you could now welcome all these goodies onto your device. So without further ado, let’s make you aware of the steps to install the LineageOS ROM onto your Redmi Note 10/Poco M3 Pro.
How to Install LineageOS ROM on Redmi Note 10 5G/Poco M3 Pro
The below instructions are listed under separate sections for ease of understanding. Make sure to follow the same sequence as mentioned. Droidwin and its members wouldn’t be held responsible in case of a thermonuclear war, your alarm doesn’t wake you up, or if anything happens to your device and data by performing the below steps.
STEP 1: Install Android SDK
First and foremost, you will have to install the Android SDK Platform Tools on your PC. This is the official ADB and Fastboot binary provided by Google and is the only recommended one. So download it and then extract it to any convenient location on your PC. Doing so will give you the platform-tools folder, which will be used throughout this guide to install the LineageOS ROM onto your Redmi Note 10 5G/Poco M3 Pro.
STEP 2: Download LineageOS ROM for Redmi Note 10 5G/Poco M3 Pro
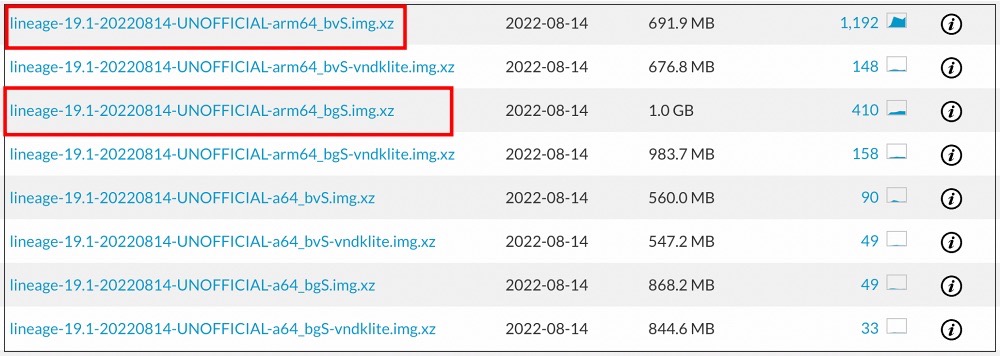
You may now grab hold of the LineageOS ROM GSI ROM for your device from below. You may find three different versions of the ROM- the normal arm64-ab, the arm64-ab-slim, and the arm64-ab-vndklite. It is recommended that you download the normal variant, i.e. arm64-ab.
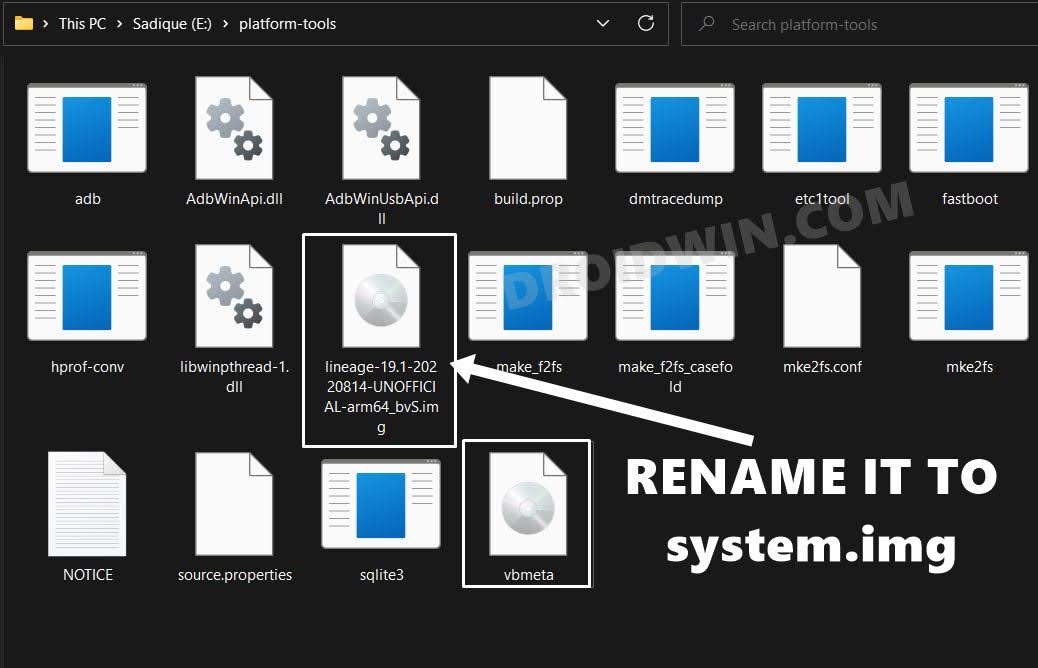
Once you have downloaded the ROM, extract it to the platform-tools folder on your PC. Likewise, rename it to system, so that the complete name becomes system.img
STEP 3: Unlock Bootloader on Redmi Note 10 5G/Poco M3 Pro
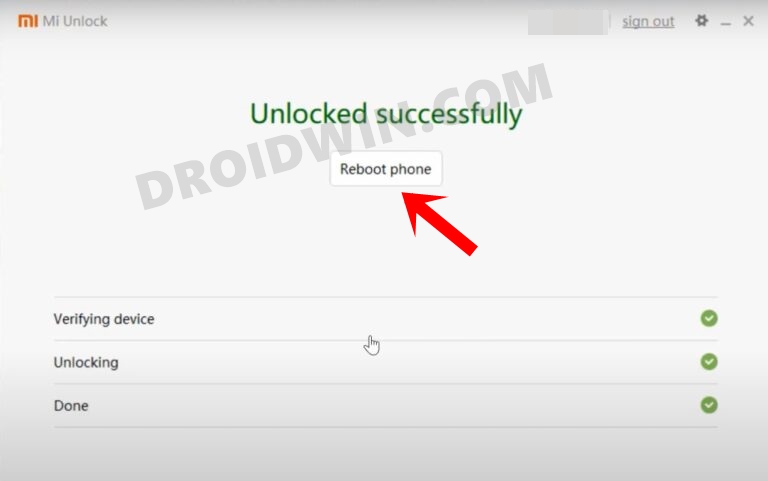
Next up, you will have to unlock the bootloader on your device. Do keep in mind that this process will wipe off all the data and might nullify the device’s warranty as well. So if that’s all well and good, then refer to our comprehensive guide on How to Unlock the Bootloader on any Xiaomi Device.
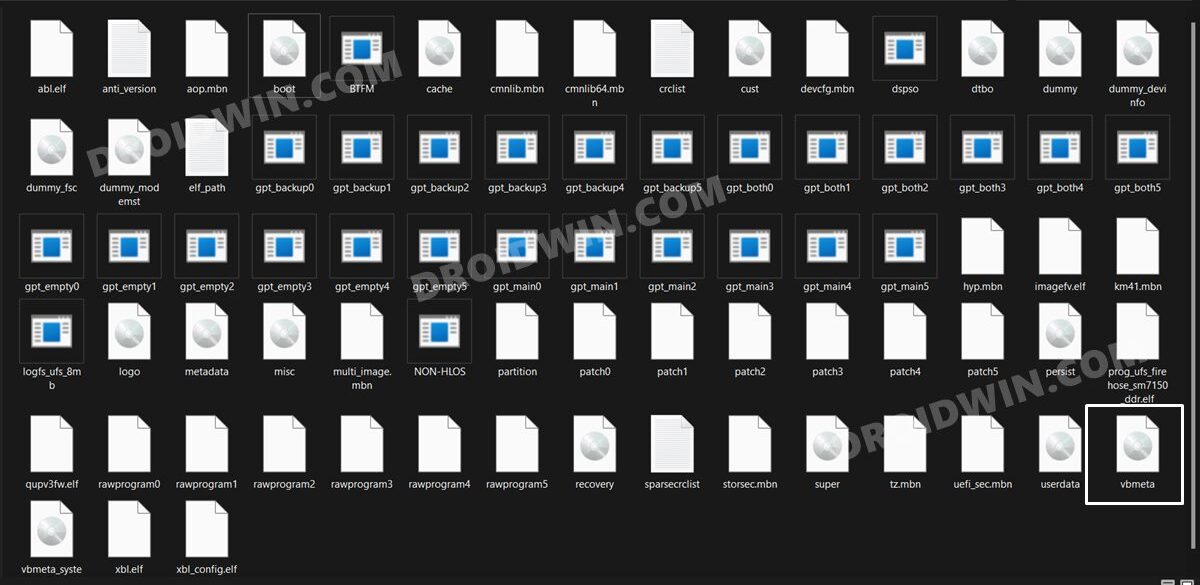
STEP 4: Extract Vbmeta
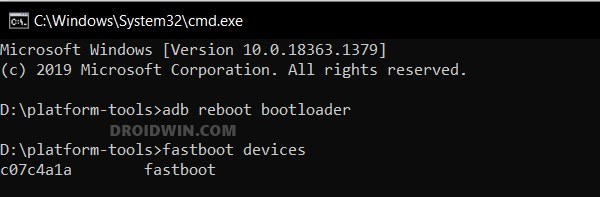
STEP 5: Boot Redmi Note 10 5G/Poco M3 Pro to Fastboot Mode
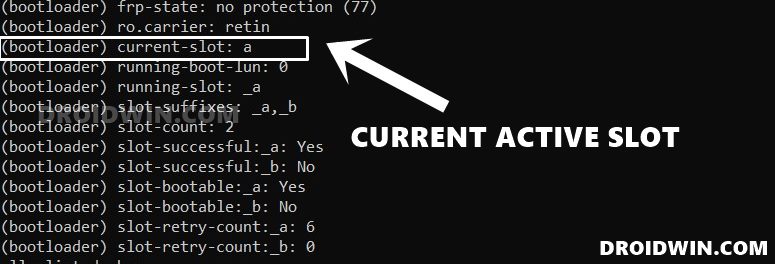
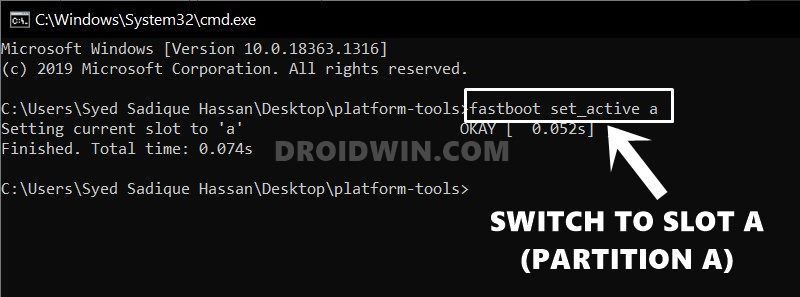
STEP 6: Make A as Active Slot
We will now be setting Partition A as the active one and then flash the GSI file in that partition. [You could do so on Partition B as well, we have just selected Partition A for the sake of uniformity throughout the guide].
STEP 7: Install LineageOS ROM on Redmi Note 10 5G/Poco M3 Pro
That’s it. These were the steps to install the LineageOS ROM on Redmi Note 10 5G/Poco M3 Pro. If you have any queries concerning the aforementioned steps, do let us know in the comments. We will get back to you with a solution at the earliest.
How to Install Pixel Experience on Redmi Note 10/Poco M3 ProFlashing GSI via DSU Loader: Device Stuck in Fastboot Mode [Fix]5G, Bluetooth, 90Hz Display, DT2W not working in GSI ROM: How to Fix
About Chief Editor